Example of handling a button click event and changing the text of an element:

$(document).ready(function() {
  $('#myButton').click(function() {
    $('#myElement').text('Button Clicked!');
  });
});

In this example, when the button with the ID "myButton" is clicked, the text of the element with the ID "myElement" will be changed to "Button Clicked!".

Example of fading in and fading out an element:

$(document).ready(function() {
  $('#fadeInButton').click(function() {
    $('#myElement').fadeIn();
  });

  $('#fadeOutButton').click(function() {
    $('#myElement').fadeOut();
  });
});

In this example, clicking the "fadeInButton" will fade in the element with the ID "myElement", and clicking the "fadeOutButton" will fade out the element.

Example of making an AJAX request and updating the content of an element:
$(document).ready(function() {
  $('#loadButton').click(function() {
    $.ajax({
      url: 'data.json',
      type: 'GET',
      dataType: 'json',
      success: function(response) {
        $('#dataContainer').text(response.message);
      }
    });
  });
});Month: May 2023
Create a simple “Hello, World!”
Create a simple "Hello, World!" application in React.js
follow these steps:

Set Up React Environment: Make sure you have Node.js and npm (Node Package Manager) installed on your machine. You can verify the installation by running the following commands in your terminal:


node --version
npm --version
Create a React App: Open your terminal and navigate to the desired directory where you want to create your React app. Run the following command to create a new React app using Create React App:


npx create-react-app hello-world-app
Navigate to the App Folder: Once the app is created, navigate to the app folder by running the following command:


cd hello-world-app
Edit the App Component: Open the src/App.js file in a code editor and replace its content with the following code:

jsx

import React from 'react';

function App() {
  return (
    <div>
      <h1>Hello, World!</h1>
    </div>
  );
}

export default App;
Start the Development Server: Save the file and return to the terminal. Run the following command to start the development server:


npm start
View the App: Open your web browser and visit http://localhost:3000. You should see the "Hello, World!" message displayed on the page.

Congratulations! You have created a basic "Hello, World!" application in React.js. Few examples of JSON data structures
 Here are a few examples of JSON data structures commonly used in web development:

Simple Object:

{
  "name": "John Doe",
  "age": 30,
  "email": "johndoe@example.com"
}

Array of Objects:

[
  {
    "name": "John Doe",
    "age": 30,
    "email": "johndoe@example.com"
  },
  {
    "name": "Jane Smith",
    "age": 25,
    "email": "janesmith@example.com"
  },
  {
    "name": "Mike Johnson",
    "age": 35,
    "email": "mikejohnson@example.com"
  }
]


Nested Objects:

{
  "name": "John Doe",
  "age": 30,
  "email": "johndoe@example.com",
  "address": {
    "street": "123 Main St",
    "city": "New York",
    "country": "USA"
  }
}
Array of Nested Objects:
json
Copy code
[
  {
    "name": "John Doe",
    "age": 30,
    "email": "johndoe@example.com",
    "address": {
      "street": "123 Main St",
      "city": "New York",
      "country": "USA"
    }
  },
  {
    "name": "Jane Smith",
    "age": 25,
    "email": "janesmith@example.com",
    "address": {
      "street": "456 Elm St",
      "city": "Los Angeles",
      "country": "USA"
    }
  }
]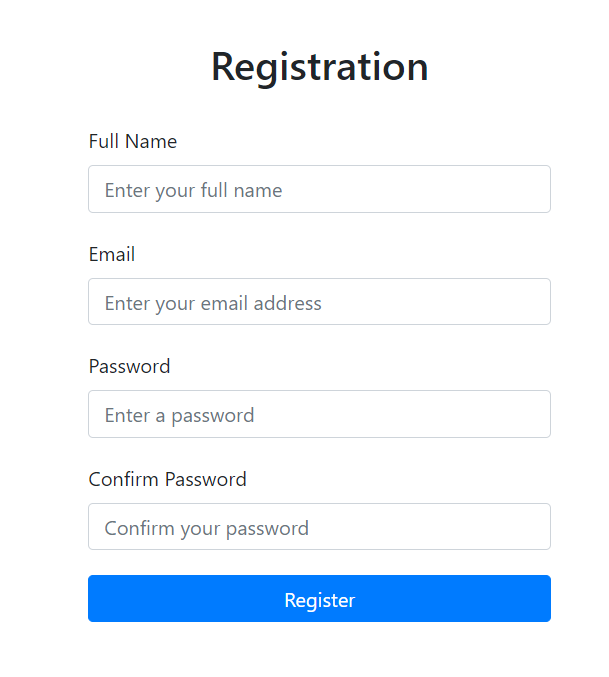
These examples demonstrate different JSON structures such as a simple object with key-value pairs, an array of objects, nested objects, and arrays of nested objects. Registration Page in Bootstrap
<!DOCTYPE html>
<html>
<head>
  <title>Registration Page</title>
  <link rel="stylesheet" href="https://stackpath.bootstrapcdn.com/bootstrap/4.5.2/css/bootstrap.min.css">
  <style>
    .registration-container {
      width: 400px;
      margin: 0 auto;
      margin-top: 50px;
    }
    .registration-container h2 {
      text-align: center;
      margin-bottom: 30px;
    }
    .registration-form input {
      margin-bottom: 20px;
    }
    .registration-form button {
      width: 100%;
    }
  </style>
</head>
<body>
  <div class="container registration-container">
    <h2>Registration</h2>
    <form class="registration-form">
      <div class="form-group">
        <label for="name">Full Name</label>
        <input type="text" class="form-control" id="name" placeholder="Enter your full name">
      </div>
      <div class="form-group">
        <label for="email">Email</label>
        <input type="email" class="form-control" id="email" placeholder="Enter your email address">
      </div>
      <div class="form-group">
        <label for="password">Password</label>
        <input type="password" class="form-control" id="password" placeholder="Enter a password">
      </div>
      <div class="form-group">
        <label for="confirm-password">Confirm Password</label>
        <input type="password" class="form-control" id="confirm-password" placeholder="Confirm your password">
      </div>
      <button type="submit" class="btn btn-primary">Register</button>
    </form>
  </div>

  <script src="https://stackpath.bootstrapcdn.com/bootstrap/4.5.2/js/bootstrap.min.js"></script>
</body>
</html>
Design a Login page in bootstrap
<!DOCTYPE html>
<html>
<head>
  <title>Login Page</title>
  <link rel="stylesheet" href="https://stackpath.bootstrapcdn.com/bootstrap/4.5.2/css/bootstrap.min.css">
  <style>
    .login-container {
      width: 300px;
      margin: 0 auto;
      margin-top: 100px;
    }
    .login-container h2 {
      text-align: center;
      margin-bottom: 30px;
    }
    .login-form input {
      margin-bottom: 20px;
    }
    .login-form button {
      width: 100%;
    }
  </style>
</head>
<body>
  <div class="container login-container">
    <h2>Login</h2>
    <form class="login-form">
      <div class="form-group">
        <label for="username">Username</label>
        <input type="text" class="form-control" id="username" placeholder="Enter your username">
      </div>
      <div class="form-group">
        <label for="password">Password</label>
        <input type="password" class="form-control" id="password" placeholder="Enter your password">
      </div>
      <button type="submit" class="btn btn-primary">Login</button>
    </form>
  </div>

  <script src="https://stackpath.bootstrapcdn.com/bootstrap/4.5.2/js/bootstrap.min.js"></script>
</body>
</html>
Simple CRUD Example in javaScript
<!DOCTYPE html>
<html>
<head>
  <title>Simple CRUD Example in javaScript</title>
  <style>
    .crud-form {
      width: 300px;
      margin: 0 auto;
      padding: 20px;
      border: 1px solid #ccc;
    }
    .crud-form input {
      width: 100%;
      margin-bottom: 10px;
    }
    .crud-form button {
      width: 100%;
      margin-bottom: 5px;
    }
    .crud-list {
      margin-top: 20px;
    }
    .crud-item {
      margin-bottom: 5px;
      padding: 5px;
      border: 1px solid #ccc;
    }
  </style>
</head>
<body>
  <div class="crud-form">
    <h2>CRUD Example</h2>
    <input type="text" id="name" placeholder="Name">
    <input type="text" id="age" placeholder="Age">
    <button onclick="create()">Create</button>
  </div>

  <div class="crud-list" id="list"></div>

  <script>
    var data = [];

    function create() {
      var nameInput = document.getElementById('name');
      var ageInput = document.getElementById('age');

      var name = nameInput.value;
      var age = ageInput.value;

      var newItem = {
        name: name,
        age: age
      };

      data.push(newItem);

      renderList();

      // Clear the input fields
      nameInput.value = '';
      ageInput.value = '';
    }

    function renderList() {
      var listDiv = document.getElementById('list');
      listDiv.innerHTML = '';

      for (var i = 0; i < data.length; i++) {
        var item = data[i];

        var itemDiv = document.createElement('div');
        itemDiv.classList.add('crud-item');
        itemDiv.textContent = 'Name: ' + item.name + ', Age: ' + item.age;

        var deleteButton = document.createElement('button');
        deleteButton.textContent = 'Delete';
        deleteButton.addEventListener('click', deleteItem.bind(null, i));

        itemDiv.appendChild(deleteButton);
        listDiv.appendChild(itemDiv);
      }
    }

    function deleteItem(index) {
      data.splice(index, 1);
      renderList();
    }
  </script>
</body>
</html>
Registration form in JavaScript
<!DOCTYPE html>
<html>
<head>
  <title>Registration Form</title>
  <style>
    .registration-form {
      width: 300px;
      margin: 0 auto;
      padding: 20px;
      border: 1px solid #ccc;
    }
    .registration-form input {
      width: 100%;
      margin-bottom: 10px;
    }
    .registration-form button {
      width: 100%;
    }
  </style>
</head>
<body>
  <div class="registration-form">
    <h2>Registration Form</h2>
    <input type="text" id="username" placeholder="Username">
    <input type="password" id="password" placeholder="Password">
    <input type="email" id="email" placeholder="Email">
    <button onclick="register()">Register</button>
  </div>

  <script>
    function register() {
      var usernameInput = document.getElementById('username');
      var passwordInput = document.getElementById('password');
      var emailInput = document.getElementById('email');

      var username = usernameInput.value;
      var password = passwordInput.value;
      var email = emailInput.value;

      // Validate the input fields (optional)

      if (username && password && email) {
        alert('Registration successful!');
        // Perform additional actions, such as sending the data to a server
      } else {
        alert('Please fill in all the fields.');
      }

      // Clear the input fields
      usernameInput.value = '';
      passwordInput.value = '';
      emailInput.value = '';
    }
  </script>
</body>
</html>
Simple login form implemented in JavaScript
<!DOCTYPE html>
<html>
<head>
  <title>Login Form</title>
  <style>
    .login-form {
      width: 300px;
      margin: 0 auto;
      padding: 20px;
      border: 1px solid #ccc;
    }
    .login-form input {
      width: 100%;
      margin-bottom: 10px;
    }
    .login-form button {
      width: 100%;
    }
  </style>
</head>
<body>
  <div class="login-form">
    <h2>Login Form</h2>
    <input type="text" id="username" placeholder="Username">
    <input type="password" id="password" placeholder="Password">
    <button onclick="login()">Login</button>
  </div>

  <script>
    function login() {
      var usernameInput = document.getElementById('username');
      var passwordInput = document.getElementById('password');

      var username = usernameInput.value;
      var password = passwordInput.value;

      if (username === 'admin' && password === 'password') {
        alert('Login successful!');
        // Redirect to the dashboard or perform other actions
      } else {
        alert('Invalid username or password. Please try again.');
        // Clear the input fields
        usernameInput.value = '';
        passwordInput.value = '';
      }
    }
  </script>
</body>
</html>
Simple Chat Application in JavaScript
<!DOCTYPE html>
<html>
<head>
  <title>Chat Application</title>
  <style>
    .chat-container {
      width: 400px;
      margin: 0 auto;
      padding: 20px;
      border: 1px solid #ccc;
    }
    .chat-messages {
      height: 300px;
      overflow-y: scroll;
      border: 1px solid #ccc;
      padding: 10px;
      margin-bottom: 10px;
    }
    .chat-input {
      width: 100%;
    }
  </style>
</head>
<body>
  <div class="chat-container">
    <div class="chat-messages" id="chatMessages"></div>
    <input type="text" class="chat-input" id="chatInput" placeholder="Type your message">
    <button onclick="sendMessage()">Send</button>
  </div>

  <script>
    function sendMessage() {
      var messageInput = document.getElementById('chatInput');
      var message = messageInput.value;

      if (message.trim() !== '') {
        var messageElement = document.createElement('div');
        messageElement.textContent = message;
        document.getElementById('chatMessages').appendChild(messageElement);
        messageInput.value = '';
      }
    }
  </script>
</body>
</html>
Simple calculator in JavaScript
<!DOCTYPE html>
<html>
<head>
<title>Calculator</title>
<style>
.calculator {
width: 200px;
border: 1px solid #ccc;
padding: 10px;
}
.calculator input {
width: 100%;
margin-bottom: 5px;
}
.calculator .btn {
width: 48%;
margin: 1%;
}
</style>
</head>
<body>
<div class=”calculator”>
<input type=”text” id=”result” readonly>
<button class=”btn” onclick=”appendToResult(‘1’)”>1</button>
<button class=”btn” onclick=”appendToResult(‘2’)”>2</button>
<button class=”btn” onclick=”appendToResult(‘3’)”>3</button>
<button class=”btn” onclick=”appendToResult(‘+’)”>+</button>
<button class=”btn” onclick=”appendToResult(‘4’)”>4</button>
<button class=”btn” onclick=”appendToResult(‘5’)”>5</button>
<button class=”btn” onclick=”appendToResult(‘6’)”>6</button>
<button class=”btn” onclick=”appendToResult(‘-‘)”>-</button>
<button class=”btn” onclick=”appendToResult(‘7’)”>7</button>
<button class=”btn” onclick=”appendToResult(‘8’)”>8</button>
<button class=”btn” onclick=”appendToResult(‘9’)”>9</button>
<button class=”btn” onclick=”appendToResult(‘*’)”>*</button>
<button class=”btn” onclick=”appendToResult(‘0’)”>0</button>
<button class=”btn” onclick=”appendToResult(‘.’)”>.</button>
<button class=”btn” onclick=”calculate()”>=</button>
<button class=”btn” onclick=”appendToResult(‘/’)”>/</button>
<button class=”btn” onclick=”clearResult()”>C</button>
</div>
<script>
function appendToResult(value) {
var resultInput = document.getElementById(‘result’);
resultInput.value += value;
}
function calculate() {
var resultInput = document.getElementById(‘result’);
var result = eval(resultInput.value);
resultInput.value = result;
}
function clearResult() {
var resultInput = document.getElementById(‘result’);
resultInput.value = ”;
}
</script>
</body>
</html>